Purchase Fundamentals Odoo
PURCHASE MODULE
Purchase is an act of buying products, services, raw material, spare parts from vendor for an organization.
The purchasing process can vary from one organization to another but there are some common key elements.
Odoo is flexible software you can map your processes onto it using its functionalities to configure required process for your organization.
In odoo, the purchase module works by installing app from “ODOO APPS”. The fundamental purchase process starts with:
ORDERS:
Orders tab consists of:
- RFQ
- Purchase Orders
- Vendors
- REQUEST FOR QUOTATION:
For executing purchase, first you need to generate RFQ:
It consists of following fields.
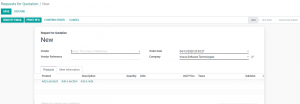
- VENDOR
Add vendor name or create it by setting master data from orders → vendor
- VENDOR REFERENCE
Add vendor reference if any.
- ORDER DATE
Write the order date on which you are ordering products.
- COMPANY
Select company so that bill will be posted in that company’s account.
- SELECTION OF PRODUCT
Select the required product by entering its name. Write its description, ordered quantity, its Unit of Measure, Taxes Applied and check the Subtotal.
- RECEIPT DATE
Enter the date on which receipts were generated from the company.
- INCOTERM
Select options for legal bindings of international and domestic trade according to conditions from the drop down or create new one. Odoo will mark the taxes and align the processes according to that selected criteria rule.
- PAYMENT TERMS
Select payment terms from the drop down according to conditions.
- FISCAL POSITION
Map your fiscal position by going in Accounting → Fiscal Position
After filling up all the details confirm the RFQ and proceed to P.O.
- PURCHASE ORDER:
After confirming RFQ, the status will transfer from RFQ → Purchase Order. You can also see receipt on top right corner with no done quantities yet.
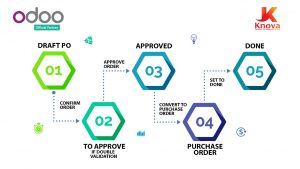
- RECEIVING PRODUCTS
Tap on RECEIVE and VALIDATE.
By validating, the status changes from ready to done. You will observe your done quantity changed with the ordered quantity.
You can change the priority of order in additional information.
CREATION OF BILL
The next step is creation of bill. Tap on Create Bill and your bill will be posted in draft. Tap on post. Click on Register Payment. By clicking on register payment a small window will open in which you select the Journal from which you are paying.

After the selection of journal, the bill will be posted in the selected journal.
You can also see your bill from vendor bill on the top right.
- VENDOR:
Create Vendor by going on create. Select individual if you are buying from local vendor or create company in case of contracting with a company.

- COMPANY ADDRESS
Provide company or an individual complete address so that you will be able to approach him any time.
- TAX ID
Provide company’s tax id.
- PHONE
Provide company’s phone number.
- MOBILE
Provide company’s mobile number.
Provide company/person email.
- WEBSITE LINK
Provide the vendor’s web link.
- TAGS
Give numerous tags of your choice.
PRODUCTS:
Configure your product from:
https://knovatek.com/product-configuration-on-odoo
Or
Watch this video in HD:
REPORTING:
Purchase reports exclusively generated for purchase transactions and the items that have in your organization.
You will see Dates on X-axis and select any measure from Measures on Y-axis.

You can also change the X-AXIS by Group By. And can also create any custom group.
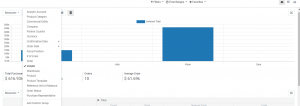
REPRESENT YOUR DATA IN CHARTS
There are three chart methods available in Odoo 13:
- Bar Chart
- Line Chart
- Pie Chart
![]()
The analysis report shows the Total Purchase, Untaxed Total, Orders and Average Order.
PRINT REPORTS
The print can only be possible in pivot view. Click on the button available at the right corner.


